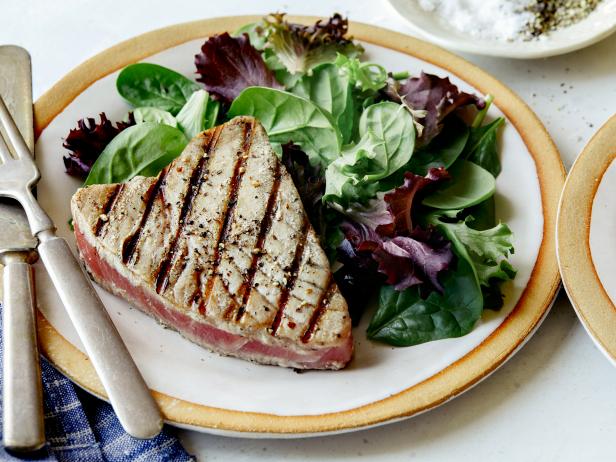
Outdoor cooks should know how to light a grill. The best way to make the most of the summer months is to use a barbecue. Nothing is better than a tasty meal prepared over an open fire. This is a great way to entertain your guests. These are the 6 steps to light your grill. Before lighting the briquettes, you should prepare some lighting gel. Once you have prepared the gel for the briquettes, apply it to them. Spread the gel using tongs until the briquettes turn a pale white color. Then, light the gel. You will need to repeat this several times before cooking.
Lighten the charcoal grill by applying lighter fluid to the top of the coal mound. The lighter fluid may splash out onto the coals you are touching. Before adding more coal, wait approximately seven to 10 seconds. Next, wait for about 15 minutes until all the ash has been removed from the coals. After this time, you can use the charcoal for grilling vegetables or meats.
A chimney is the easiest method to light a charcoal grill. A chimney is a metal tube which traps heat. When the charcoal is heated, it expands, drawing air into the chimney. As the coals heat up, they self-fan as if they were being fanned all the time. Aluminum stove pipes are great starters. A chimney is an essential tool for grilling. Be sure to clean it regularly.
The next step in lighting the grill involves placing the charcoal briquettes on the charcoal grate. The apex should be the center of the grill. Light the chimney by spraying lighter fluid on the top part of the pyramid. After about 30 seconds, you should let the lighter fluid soak into the coals. After the charcoal has been fully lit, add the food to your cooking grate. This will take about 20 minutes for the charcoal to become gray.
Knowing how to light a grill requires that you know how to do it correctly. The Looftlighter will work best, but you can also use other techniques that are more suitable for outdoors. An electric starter is an electric stove burner element that bends in an "U" shape with a handle on it. The Looftlighter is the best method for lighting any grill. It is labor-intensive but reliable enough to get the fire going.
If you don't have a chimney, use a newspaper to start the coals. To make the newspaper last longer, you can sprinkle some cooking oil over it before lighting it. The flames will flicker as the coals are heating up. Once all the coals are ashed over, you can add lighter fluid and light the grill. Stacking the charcoal will increase contact and help the fire spread.
FAQ
Are there any ingredients I can buy to cook?
You don't need to buy every ingredient. Many grocery stores carry pre-made sauces and items that can be used as substitutes. Pre-made meals are a great way to save money.
What is the best career path for someone who wants to be a chef? What are the best ways to start your career as a chef.
If you're interested in becoming a chef, you should consider starting as an apprentice. Apprenticeships allow you to work for several years without paying any tuition fees. You can apply to become a sous-chef after you have completed your apprenticeship. Sous chefs assist cooks with tasks such as making salads, and desserts. They oversee all aspects of the restaurant's operation.
What are the health benefits of slow cooking?
Slow cookers can be very helpful because you can prepare delicious meals quickly. Slow cooker recipes often have a lower oil and fat content than traditional recipes. Slow cooker recipes are also convenient as they can take care of themselves while your sleep.
Is there a difference in a chef and a cooker?
A chef prepares food to be served to others. A cook prepares food for himself or herself. While both jobs involve preparing food, a chef works directly with customers. This may mean that they might have to choose what to cook for guests depending on their preferences. A cook does not interact with customers. Instead, he or she ensures that the food tastes good before serving it to anyone.
How Much Does it Cost to Learn Culinary Arts Skills?
You will find that the price to study culinary arts is variable. A four-year degree usually costs around $40,000. A two-year associate's level degree can cost less than $5,000. The tuition rate you choose depends on the program. Private institutions charge higher prices than public ones.
What equipment do I need to cook?
To learn to cook, you don’t need to have any special equipment. However, having the right tools can make cooking easier. You could, for example, use a spoon to make pasta or a whisk to whip the egg whites into stiff peaks. Having the right tools makes cooking less intimidating and allows you to start faster.
How can leftovers be stored in the most efficient way?
Tupperware containers work well for leftovers. These containers protect food from spoilage and keep it fresh. They can also keep food warm longer. Remaining food can be frozen in freezer bag. You can freeze leftover food by placing it in another freezer bag. This will prevent any air from escaping. Once food has been frozen properly, seal it with a ziplock bag.
Statistics
- On average, chefs earn $58,740 a year, according to the BLS. - learnhowtobecome.org
- You'll be amazed that over 90% of CIA students receive scholarships and grants to finish their culinary studies. (ischoolconnect.com)
- under 10 Kids have been taught that there is special food just for them, and Fiese says that 10 percent of kids will throw a tantrum if they don't get the food they want. (washingtonpost.com)
External Links
How To
How to make a perfect eggroll
Omelets are my favorite breakfast dish. How can you make them perfectly? I have tried many different recipes and methods, but none of them work. So I am sharing some tips and tricks today to help you make fluffy, delicious omelets every morning.
It is important to know that eggs can be temperamental when making omelets. The eggs must be fresh from an organic source and kept at room temperature until they are ready to be cooked. If you don't keep them cold enough, the whites won't form properly, and the yolks will break down too much and become runny. This can make your omelets look bizarrely colored. If you're going to cook them immediately, it is best if the eggs are still warm.
Another tip is to separate each egg before adding them to the saucepan. The yolk and white should not be mixed together as this can cause the omelet's curdle.
The bottom part of an egg that is added directly to the stovetop might be burned, which could cause a ruined texture in your omelet. Instead, put the egg in the microwave for 10 seconds before putting it into the pan. The microwave heat will cook the egg just right without making it too hot.
Next, let's talk about mixing the eggs. When mixing eggs, it is important to thoroughly beat them. To do this, take the bowl from the mixer and flip it upside-down. Now shake the bowl vigorously. This will whip the air around the bowl and mix the egg well.
Now comes the fun part: adding the milk to your mixture. Fold the eggs in the milk mixture by first pouring half of it into the egg whites. You don't need to worry if streaks remain. They will disappear once you flip your omelet.
After you have folded your eggs, heat up the oil on medium heat. Wait for it to get hot. Once the oil begins to heat, add 1/4 cup butter and swirl the pan to coat it. Now carefully crack open the lid of the pan and sprinkle salt into the pan. The salt will help to prevent the omelet's sticking to the pan.
Once the omelet has formed completely, cover the pan and let it set for a few minutes. Flip the omelet with a spatula, or flip it upside down. Cook the other side for about a minute. Serve immediately after removing the omelet from its pan.
This recipe works best using whole milk. Skimmed milk is also possible.